 |
|
|
 Dazed & Confused | How To Dazed & Confused | How To
How To Fake Fingerprints
Chaos Computer Clubs
In order to fake a fingerprint, one needs an original first. Latent fingerprints are nothing but fat and sweat on touched items. Thus to retrieve someone elses fingerprint (in this case the fingerprint you want to forge) one should rely on well tested forensic research methods. Which is what's to be explained here. (Figure 1).
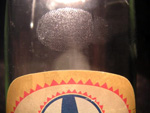
Figure 1: Fat residue from fingerprint
A good source of originals for our counterfeits are glasses, doorknobs and glossy paper. The standard method of forensic research makes them visible: Sprinkling it with colored powder, which sticks to the fat (Figure 2).

Figure 2: Visualisation with graphite powder
Another solution involves Cyanoacrylat, the main ingredient of superglue. A small amount thereof is poured into a bottlecap, which is then turned upside down and put over the fingerprint. (Figure 3).
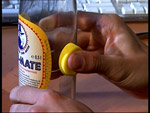
Figure 3: Visualisation with superglue
The Cyanoacrylat gasses out and reacts with the fat residue to a solid, white substance (Figure 4).

Figure 4: Print after Cyanacrylate processing
The further treatment involves scanning/photographing (Figure 5) and a bit of graphical refurbishment (Figure 6).
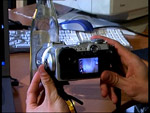
Figure 5: Digitalising the print
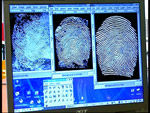
Figure 6: Brushing up the image of the print
The goal is to get an exact image of the fingerprint, for further use as a mold, out of which the dummy is made. The easiest way is to print the image on a transparency slide (the ones normally used for an overhead projector) with a laser printer. The toner forms a relief, which is later used similar to letter press printing. Wood glue is suitable for producing the dummy (Figure 7)
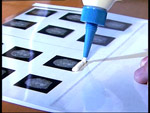
Figure 7: Wood glue for the dummy
A small dash of glycerene may be used to optimize humidity and workability. After thorough mixing, the dummy gets coated with a thin layer of the compound (Figure 8,9).
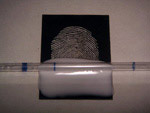
Figure 8: Covering the dummy with wood glue
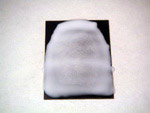
Figure 9: Glue layer on the printout
After the glue has dried (Figure 10), it is pulled off the foil (Figure 11) and is cut to finger size.
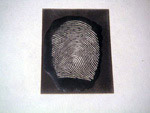
Figure 10: Hardened glue
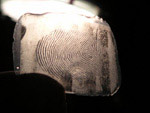
Figure 11: Dummy, ready to use
Theatrical glue is used to glue the dummy onto the own finger (Figure 12).
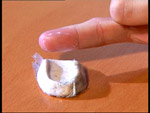
Figure 12: The new identity is ready! |
| |
|
|
|
|


